
How to Make Homemade Pita Bread
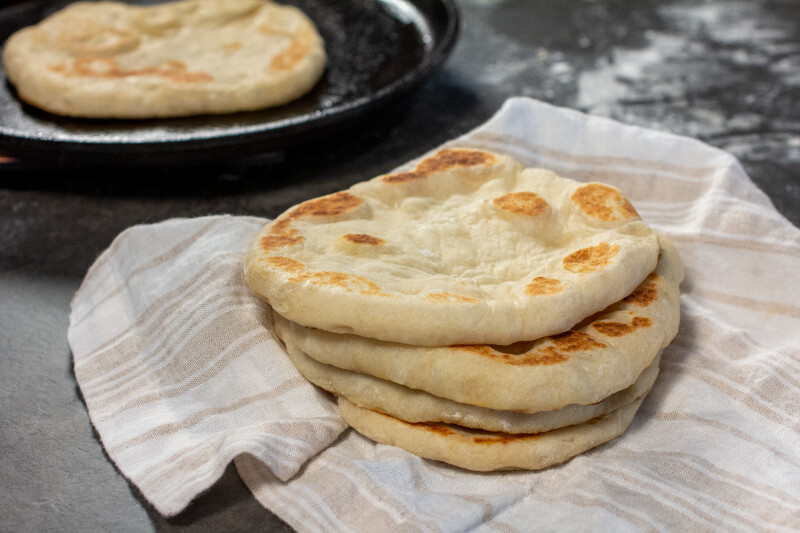
A staple in most Mediterranean and Middle Eastern households has always been pita, or pitta, bread. It’s a round flatbread typically served with a wide range of side dishes, dips, and mezze platters, including falafel, hummus, tzatziki, and more.
Among Greek cuisine, specifically, pita bread is one of the most widely-known foods as it’s regularly served in street food dishes and family meals like gyros.
If you want to make delicious, homemade pita bread, check out our easy pita recipe today!
Is Making Homemade Pita Worth It?
Depending on your skill level in the kitchen and how much time you want to spend cooking, making your own pita bread at home is definitely worth it.
The recipe isn’t very complex, but it will require some planning and forethought on your part, as the dough must rest until it doubles in size before you can cook it. Typically, this takes a minimum of two hours. So if you’re in a hurry, you may find it more convenient to buy pita bread at your local grocery store instead (…and for the fresh from the oven feeling, warm it up in the toaster or oven).
But if you have time to set aside, this recipe will leave you with fresh-baked, fragrant, warm pita bread to enjoy with your meal.
How to Make Pita Bread
Pita bread is a relatively simple dish-–especially if this isn’t your first time making bread. You only need a handful of ingredients, a bit of resting time for the dough, and a hot skillet to cook it on.
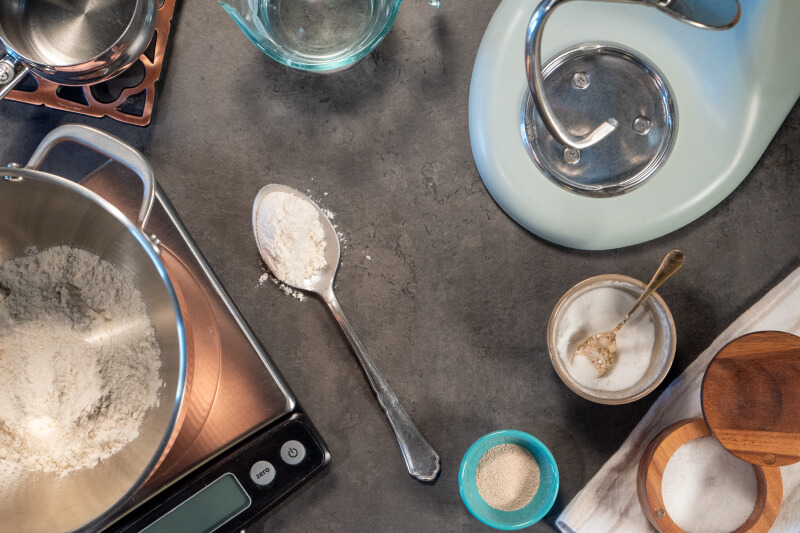
What Tools Are Needed to Make the Dough?
Similar to the ingredient list, the tools you need for this recipe are very straightforward.
We recommend the following:
- Mixing bowl
- Whisk
- Stand mixer with a dough hook attachment
- Spoon or dough scraper
- Proofing bag
Additionally, you will need a knife, a parchment-lined pan, a rolling pin, and a cast-iron skillet to finish resting, prepping, and cooking the pita. You may also find a food scale helpful when dividing the dough into equal portions.
If you don’t have a stand mixer with a dough hook, you can knead the dough by hand. Just make sure you mix in your ingredients properly and achieve the desired consistency.
A Step-By-Step Guide to Making Pita Bread
Once you’ve gathered your ingredients and cooking implements, it’s time to start making pita bread.
Step One: Starting the Dough
To start your dough, you’ll need to combine your lukewarm water, sugar, and yeast with 90 grams of flour in your mixing bowl. Whisk these ingredients together until they’re well combined, and set them to the side in a warm place for fifteen minutes.
Step Two: Combining the Remaining Ingredients
After your dough rests, add oil, salt, and another 90 grams of flour. Then, attach your dough hook to your mixer, and mix the ingredients until the dough is soft and doesn’t stick to the sides of the bowl.
If the dough continues to stick, add another 45 grams of flour.
Step Three: Kneading the Dough
Once your dough is no longer sticking to the bowl, turn your mixer on a low speed and allow it to knead the dough for approximately five minutes.
While you’re waiting for the dough to finish this step, go ahead and lightly flour a flat surface and thinly oil a bowl.
Step Four: The First Proof
When your dough is kneaded, scrape down the sides of your mixing bowl and pour the dough out onto your floured surface. Then, form it into a ball and place it into your oiled bowl. Roll the dough ball around the bowl until it is evenly coated with the oil.
After your dough is well-oiled, place it into a proofing bag and leave it to rest in a warm, draft-free area until the dough doubles in size. On average, this process takes at least two hours, but more time may be required if it hasn’t adequately risen
Step Five: Dividing the Dough
Once the dough has successfully risen, remove it from the proofing bag and place it on a lightly floured surface. Cut it into six equal pieces with a sharp knife.
Note that you can use a food scale in this step to ensure that your dough balls are precisely the same size if you prefer.
Step Six: Forming Your Dough Balls
When you have equally-sized dough chunks, go ahead and roll them into balls. To do this, you’ll need to pull in the sides of each dough ball and tuck the ends underneath before rolling them between your hands to achieve the desired effect.

Step Seven: The Second Proof
After you’ve rounded your dough balls out, place them two inches apart on a parchment-lined pan that you’ve dusted with flour. Then, you’ll need to place this pan back in the proofing bag, where it must rest for thirty minutes.

Step Eight: Rolling Out Your Pita & the Final Proof
When the second proof is finished, roll your dough balls out with a rolling pin until they form round, ¼-inch-thick pitas. Then, rest the dough for a final thirty-minute proof.

Step Nine: Cooking Your Pita
Once the final proof is complete, brush a cast-iron skillet with a small amount of oil and set it over medium heat. When the pan is hot, add each pita to the skillet and cook it until the bread puffs up and the bottom browns slightly. This should take approximately two minutes.
Finally, flip the pita over and repeat the two-minute cook on the top and enjoy!
Frequently Asked Questions
When you first mix your yeast with the other ingredients, you need to look for bubbles to form as you whisk it and as it sits over the fifteen-minute rest period. If no bubbles form, your yeast is inactive and will not help your dough to rise during any of the proofs.
If your pita doesn’t puff up when you cook it in your skillet, it may be because your pan isn’t hot enough. Make sure that you have sufficient heat so that your bread can properly bake and fry in the skillet.
We haven’t specifically tested how gluten-free flours and other substitutions work in our recipe, but if you’d like to create a recipe, please comment below.
Yes – but this recipe is for our traditional pita bread. If you’d like us to make a recipe, contact us. Alternatively, we offer freshly baked keto-friendly pita bread, click here to find Keto bread near you.
Yes! Pita bread is made with no animal products or byproducts. That means there are no dairy, eggs, or animal fats used at all. It’s 100% vegan-friendly.
You can substitute healthier options in this recipe, wherever you want, but we cannot guarantee that the outcome will be exactly right, as some substitutions may not work well with our recipe. If you do try a substitution, please tell us about it in the comments below!
You can meal-prep pita bread in one of two ways.
If you want to prep the dough to be cooked later, simply follow the steps in the instructions above and place it in the fridge after the final proof. It’s crucial that you do not refrigerate the dough until after it has properly risen because the cold can interfere with the yeast and prevent your pita from developing a fluffy texture.
If you want to go ahead and cook your pita and store it for later, you can do that too. Simply follow the cooking instructions and place your cooked pita in an airtight container after it cools.
You have several different storage options for your pita. Avoid heat sources (like on top of the fridge) and keep out of direct sunlight. In most cases, you can leave it in an airtight container in your pantry or breadbox for five to seven days, or you can extend its shelf-life by storing it in your freezer, which can last up to three months.
Homemade Pita Recipe
Combine the warm water, sugar, and yeast with 90 grams of flour; whisk until blended and set it in a warm place for 15 minutes.
15 Minutes
Add the oil, salt, and an additional 90 grams of flour. Using a dough hook attachment, mix until the dough is soft and no longer sticks to the sides of the bowl.
NOTE: If the dough still sticks, add 45 grams of flour. With the mixer on low speed, knead on low for about 5 minutes.
5 Minutes
Scrape the dough onto a lightly floured surface, form it into a ball and place it into a lightly oiled bowl; roll the dough in the bowl to coat the dough surface with oil. Place the bowl in a proofing bag and let it rest in a warm draft-free area for at least 2 hours or until the dough has doubled in size.
2 Hours
Remove the dough from the bowl onto a lightly floured work surface and cut the dough into 6 equal pieces with a sharp knife. Using a food scale to weigh each piece will ensure they are equal in size.
Form each piece of dough into a small ball, pull the sides of the dough ball, and tuck the ends underneath. Set the balls two inches apart onto a parchment-lined pan dusted with flour; place the pan back into a proofing bag and allow the dough to rest for 30 minutes.
30 Minutes
Using a rolling pin, roll the dough balls into flat, round ¼-inch pitas and rest the dough for an additional 30 minutes.
30 Minutes
Over medium-high heat, brush a cast-iron skillet with a small amount of oil; once the pan is hot, add each pita to the skillet and cook until the bread puffs and the bottom browns slightly (about 2 minutes). Flip and cook for 2 additional minutes.
2 Minutes
Serve immediately, or store in an airtight container for 5-7 days.
Ingredients
Directions
Combine the warm water, sugar, and yeast with 90 grams of flour; whisk until blended and set it in a warm place for 15 minutes.
15 Minutes
Add the oil, salt, and an additional 90 grams of flour. Using a dough hook attachment, mix until the dough is soft and no longer sticks to the sides of the bowl.
NOTE: If the dough still sticks, add 45 grams of flour. With the mixer on low speed, knead on low for about 5 minutes.
5 Minutes
Scrape the dough onto a lightly floured surface, form it into a ball and place it into a lightly oiled bowl; roll the dough in the bowl to coat the dough surface with oil. Place the bowl in a proofing bag and let it rest in a warm draft-free area for at least 2 hours or until the dough has doubled in size.
2 Hours
Remove the dough from the bowl onto a lightly floured work surface and cut the dough into 6 equal pieces with a sharp knife. Using a food scale to weigh each piece will ensure they are equal in size.
Form each piece of dough into a small ball, pull the sides of the dough ball, and tuck the ends underneath. Set the balls two inches apart onto a parchment-lined pan dusted with flour; place the pan back into a proofing bag and allow the dough to rest for 30 minutes.
30 Minutes
Using a rolling pin, roll the dough balls into flat, round ¼-inch pitas and rest the dough for an additional 30 minutes.
30 Minutes
Over medium-high heat, brush a cast-iron skillet with a small amount of oil; once the pan is hot, add each pita to the skillet and cook until the bread puffs and the bottom browns slightly (about 2 minutes). Flip and cook for 2 additional minutes.
2 Minutes
Serve immediately, or store in an airtight container for 5-7 days.
TOUFAYAN BAKERIES
The Toufayan family is proud to make the finest tasting and healthiest breads for your family. We’re always glad to hear from you, so if you have a moment, drop us a line at info@toufayan.com or leave a comment below.